
What is remove nail enhancements?
Many women dream of a quality and neat manicure, and increasingly, women tend to do manicure or enhance gel polish, as this procedure saves time and allows you to boast of great results for a long time. Gel nails are usually very durable, are painted in many layers and are also protected by a hard coating on the outside. Gel nails are wonderful on the grounds that they last longer and are difficult to chip. It's these equivalent properties, notwithstanding, that make gel nails an aggravation to eliminate.
While going to a salon to get them expertly taken off is generally the most appropriate response, there are times where that is definitely impractical. Whether you're flat broke for the week or it's the last minute before a major party, in some cases eliminating your gel nails at home is the main choice. In the event that you will go this course, nonetheless, it's ideal to do so appropriately. All things considered, scratching and pulling at the gel to get it off can cause harm. All things considered, follow this article and you'll have returned to your wonderful normal nails right away by any stretch of the imagination.
What you'll need
Prior showing you what to do, here is what you will need to remove nail extension at home:
- You will need acetone
- Cotton
- Foil wraps
- Pusher or orange wood stick
- Buffer
- Files
- Paper towels
Nail enhancements removal steps
If you have all the tools already, now we can go on the tutorial. Most likely you will have gel polish on the top of your natural nails or dipping powder and maybe acrylic nails, and you can either have short or long nails as your preference for your nail. But now it does not matter what type of nail enhancement you have. We will share to you pro ways how to take it off safely and easily.
Step 1:
Before you move on please take a file and lightly buff the shine off before you soak, because that way the acetone can penetrate into the gel polish and soak off faster. If you have dipping powder on your nails, you will buff as much as you can. So then that way you don’t have to soak for too long. Keep doing that until you finish the whole hand.
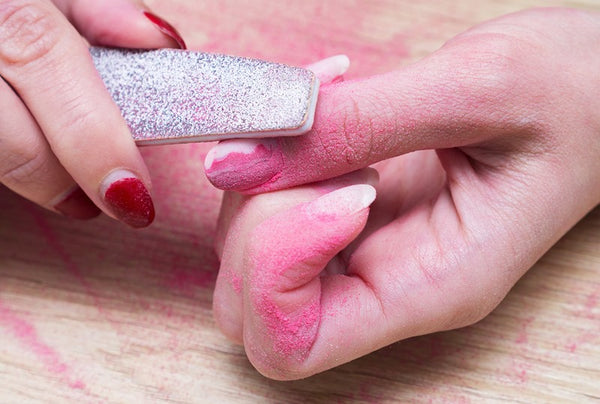
Step 2:
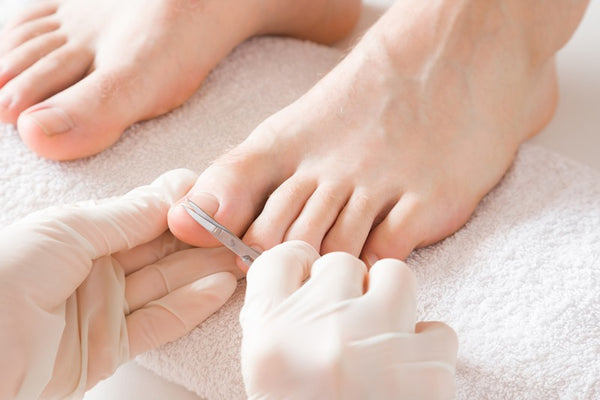
When you take in that shine a layer off, you could take some the gel color off too, but you don’t have to main key is to take all the shiny layer on top off, because if you keep that shiny layer on, the acetone can not penetrate through and then it would take a lot of time for soaking. But those people have long nails with acrylic and some design on, we would recommend you take some design off with a nail clipper if it is too long, so cut off the lane first. That way you don't have to do a lot of work. Cut it off before you soak, so you do the same with the rest of your nails.
The pro tip of this step is you don’t cut too low to your free edge. Because sometimes you have extra skin underneath and you might hurt yourself. So we always say, leave a little length while you are cutting. And you can take the file and easily take off the color and the shine. You have the matte top coat so you can not really see the shine but you can use the file to easily file off the gel polish and acrylic. When you have a long nail, you might have to do some more filing. When you have acrylic you can do the same thing. All you do is just shape the nail down as much as you can. And clip that acrylic as much as you want so you will save a lot of time soaking.
Step 3:
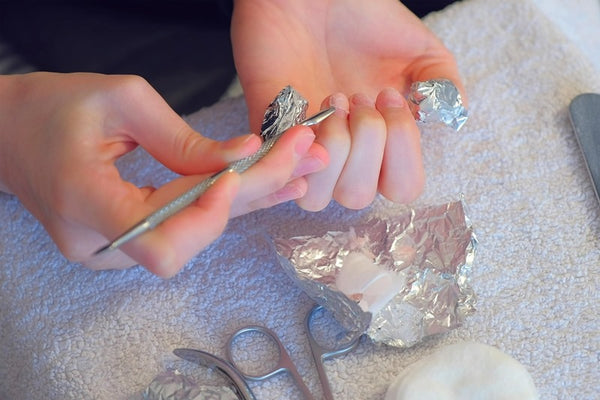
Take foil wrap and cotton to cover the surface of the nail. Apply some acetone on the cotton, place it on top. And then just wrap them. Make sure the cotton has enough acetone to cover the entire nail, then you just roll that foil together. Leave it like that in your nail. To speed up the soaking process, you can also take your towel, put it in warm water and keep it in 1 or 2 minute and then cover it with your whole hand. The heat will accelerate the process. Then you don’t have to soak it long. Wait and check on it for about 5 minute and check to see everything is nice and soft. And then take the foil and wrap off.

Step 4:
Take the orange stick or the pusher and lightly scrape the soft gooey product that leftover on your nails off. Don’t do it too hard. Just push gently without pressure. Then take a buffer and buff it out and take the file to file your nail nicely into shape and strong in the meantime. After removing mostly everything, you still have some thin coat on top of the nails, that way you can slowly transition it and then just let it grow out. In the meantime you still have the enhancement to keep that tip strong. And you can file and soften that edge around, that way everything is nice and soft then you don’t have to sharp edges.
Step5:
After you’re done with everything, take a nice cream to put in your nail finger of any essential cuticle oil. That is how you maintain them. Do it every night before you go to bed. Especially in the winter time, you really need that.

Tips to remove nail enhancement
- Eliminate surface beam on the nail improvement with a 150-coarseness nail document. Many gel top coats are acetone safe and won't permit the dissolvable to infiltrate.
- Leave the nails in the acetone for 30-45 minutes. The nails should not be eliminated from the acetone, so check if the client keeps them lowered in the bowl or accurately enclosed by foil since, in such a case that they are taken out, the item sets once more and will expand the expulsion time.
- Continuously recall substance wellbeing and security with regards to managing solvents; this incorporates the warming system and removal strategies.
- When you have tenderly eliminated the improvement, play out a little nail trim to condition and rehydrate the client's nails and hands and inform them with respect to the right aftercare.
Dazzle Dry System
The information above is a complete tutorial on how you can safely take off the nail enhancements. However, at Dazzle dry system, we make everything simple and easy for our valued customers. Our award-winning four-step nail care system is formulated with our signature Nail Prep, Base Coat, Lacquer and Top Coat. Together, it provides the fastest-drying, longest-lasting, natural nail treatment you’ve ever experienced.

Step 1: Nail Prep
Promote longer-lasting manicures with the perfect nail canvas. Nail Prep cleanses the nail plate while providing beneficial moisture, calcium, vitamin B5, & hydrolyzed protein.
To Use: Scrub each nail thoroughly with Nail Prep to remove any oils or lotions.
Step 2: Base Coat
Our Base Coat is specifically formulated for natural nails to keep polish lasting longer. Not for use on acrylic or artificial nails.
To Use: If Base Coat is cloudy or jelly-like, stand the bottle in 1 inch of hot water until the product becomes clear. Apply two layers to each nail, allowing each layer to dry matte. Avoid contact with skin to prevent lifting.
Step 3: Lacquer
Available in more than 150 shades, our Lacquer delivers quick-drying, long-lasting wear and is formulated exclusively for the Dazzle Dry system.
To Use: If Nail Lacquer is thick add 6-8 drops of Revive. Add more if necessary. Apply two layers of Nail Lacquer to each nail, allowing each layer to dry matte. Avoid contact with skin to prevent lifting.
Step 4: Top Coat
Our quick-drying, non-yellowing Top Coat provides high gloss and protection against abrasion.
To Use: If Top Coat is thick, add 6-8 drops of Revive. Add more if necessary. Apply one layer of Top Coat to each nail after Lacquer has dried matte. Wait five minutes and you’re done!
Revive
Your Nail Lacquers and Top Coat may become thick due to evaporation. This is perfectly normal. Revive was designed to reconstitute your products to the desired consistency.
To Use: If Top Coat or Nail Lacquer is thick add 6-8 drops of Revive. Add more if necessary. Do NOT add Revive to Base Coat as it will ruin the product.
Thank you for being Dazzle Dry experts and if you need any further assistance, please visit our website at: https://dazzledryaustralia.com.au/

